
To see the image in 3D, click HERE.
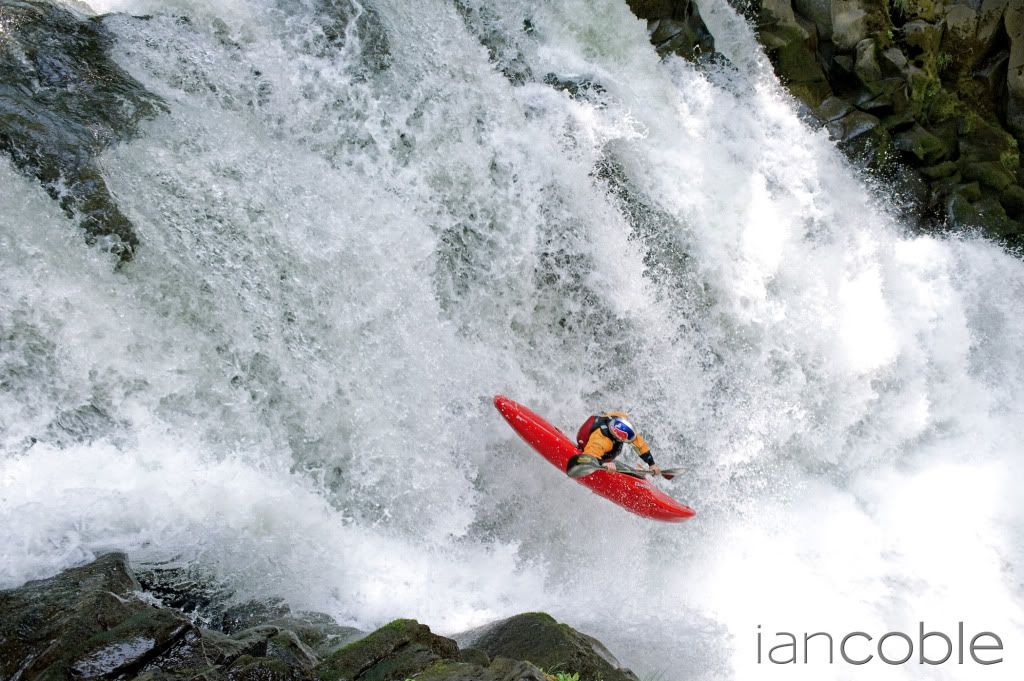
I just recently finished up a really fun shoot for Red Bull Energy Drink with professional kayaker Tao Berman. What made this shoot so incredible, wasn't just the sheer athleticism in front of the camera, but was the amount of creativity I was afforded. In organizing the shoot, Red Bull had essentially given me free reign to shoot this however I wanted.
For the last few months, I've been dying to try shooting something in 3D. Since I saw the James Cameron movie Avatar, I've wanted to test the 3D technology and see how it translated from video to still. When this shoot with Tao came before me, I knew this was the shoot to make it happen.
In doing my research for this shoot, I'd come across plenty of other 3D photos, but none of them were action or motion based. Everything I was coming across was static... whether a landscape, portrait or still life. Not finding any 3D (also called anaglyph) photos of sports left me really excited. This was going to be something relatively new, and it's always fun to be the guinea pig on new things as you never now what you're going to encounter or how it's going to turn out.
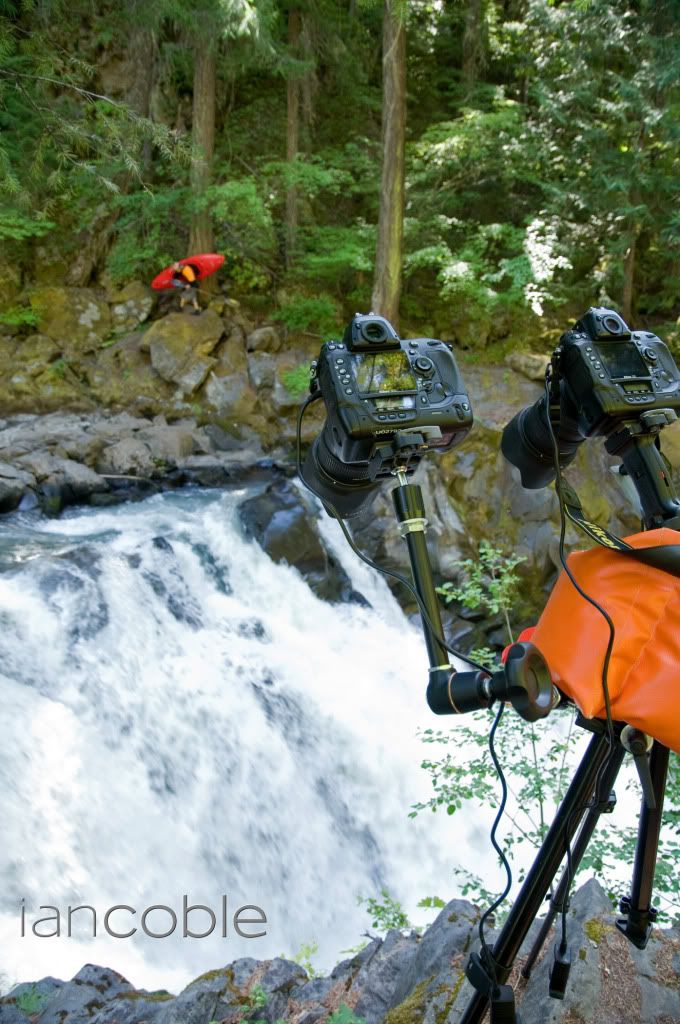
(A brief note: with new versions of Photoshop, it's now possible to create 3D images in post production with a single camera and manipulating the single resulting image. But that's not what I wanted to do here. With this shoot, I wanted to achieve a true 3D image, by shooting two cameras offset from one another. The advantage in using two cameras, is that the resulting 3D image has more depth and texture that it can draw out as it does not require photoshop to extrapolate and create new information.)
Given the inherent danger in running waterfalls, and not wanting to subject Tao to any more danger than necessary, we only had a few cracks at shooing this. With that in mind, we were running 3 cameras at all times, in order to ensure maximum coverage and guarantee differing angles and vantage points.
In the end, the shoot went off great. The resulting 3D image turned out better that I could have hoped. I'm excited to put this technology to use again on some more shoots in the near future... stay tuned.
If you'd like to see some of the other images from the shoot, you can see a small gallery HERE.
Final note: if you're interested in learning more of the details about how to shoot a true anaglyph/3D image, post a comment below. If enough people are interested, I'll follow up with a tutorial post later.
very cool Ian, nice work!
ReplyDeleteVote #1 for a follow-up on 3-D.
ReplyDeleteYou better do the tutorial... Nice work, buddy!
ReplyDelete+1 for tutorial
ReplyDeleteInsanity, I'd love to see how its done.
ReplyDeleteTutorial! Love the blog, btw.
ReplyDeleteRob
I'd love to see a tutorial on shooting 3D...
ReplyDeleteHey everyone,
ReplyDeleteWe got a lot of comments asking for a tutorial on how this was shot in 3D. As a result, I teamed up with Red Bull to answer some of the most common questions. I'll be posting a link on the blog soon, but for now, you can see the entire article with the tutorial on the Red Bull Illume website.
https://www.redbullillume.com/insight/featured-stories/double-vision-shooting-3d-with-2-cameras.html
If you still have questions, feel free to post them here and I'll do my best to answer.
Cheers!